HOME
Shopping Cart
Sterling Bracelets
Sterling Necklaces
Sterling Brooches
Sterling Buckles
Sterling Earrings
Sterling Rings
Traditional
Archery
Round Combs
Quilt Block Inlay
Turquoise & Silver
Folklore
Sterling Rings
Green Man Ring
Triple Moon Ring
Spider Ring
Custom Rune Ring
Eternal Life Rings
Pewter
Odin Figurine
Brigid's Cross
Porringers
Fairy Tales
Pet Jewelry
Seals & Signets
Special Treasures
Silver Dining Ware
Custom Cut Stones
Leather and Belts
Custom Design
Your Design
Gallery
Show Everything
Gold Work
Friends of the Forge
Measuring Ring Sizes
About Brigid's Forge
Links
Order
Email
All items handmade in the U.S.A.
Exhibiting Members of the
Craftsmen's Guild of Mississippi
You are visitor:

|  |
About Us |

Custom designer jewelry
by Robert and Debra Shinn
|

About Brigid's Forge
The Workshop
The Forge
Visit Us
Local Music
Natchez Trace
Nice Places
Family
Sandcast Ankh - continued
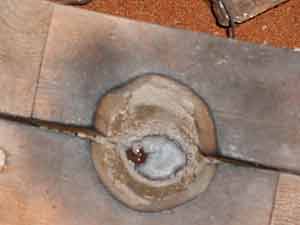
Step 22
Sprue button.
After a few minutes, the metal still visible in the pour hole will cool and
lose its red color; be careful as it is still very hot! Note that the molten
silver does not burn the spruce wood as long as it does not remain on it,
simply flowing over it. The scorch marks are from the torch flames after many uses.
|
|
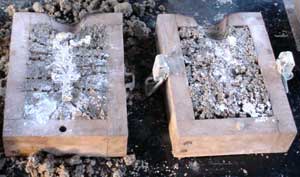
Step 23
Open the flask.
Open the flask. Metal should have filled all the impressions.
The large piece of metal left in the sprue serves a purpose;
as the metal cools, the thickest part shrinks the most as molten metal
from its center fills voids forming in the other parts that are thinner.
We isolate this deforming process to the part we will cut off anyhow.
|
|
Step 24
Remove the casting.
Using a pair of tweezers, preferably with insulated handles,
pull the casting out of the sand. Some sand will stick to it; seldom will
a mold be good enough for more than a single use.
Silver wires will project out from it where the vent lines filled.
Remove the sand from the frame; most can be reused, but some that touched the
melted silver may be too hard to deal with any more.
|

|
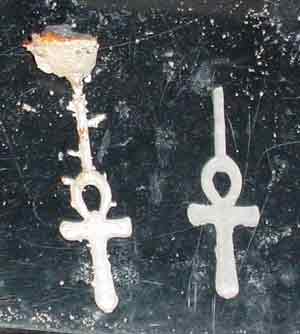
Step 25
Clean the casting.
Wash off the casting; grains of sand have no business around a
jeweler's bench. Here we compare the casting (left) with the acrylic model (right).
The vent wires will be removed, but the long straight sprue will be left
to make a pendant loop.
|
|
Step 26
File and polish.
Remove the sprue button and wires with heavy pliers. File the edges.
Bend the sprue into a loop and solder onto the back. Polish, first with
tripoli, then rouge. Wash and dry again. Finished!
|

|
<< Previous
Back to Workshop
Disclaimer: All techniques described are performered by professionals in a professional workshop.
These techniques work well for us; we do not warrant them for anyone else. We cannot be responsible for
anyone's property, profit, or safety. If you wish to make beautiful objects, pictures and
text are no substitute for a good class.
|