HOME
Shopping Cart
Sterling Bracelets
Sterling Necklaces
Sterling Brooches
Sterling Buckles
Sterling Earrings
Sterling Rings
Traditional
Archery
Round Combs
Quilt Block Inlay
Turquoise & Silver
Folklore
Sterling Rings
Green Man Ring
Triple Moon Ring
Spider Ring
Custom Rune Ring
Eternal Life Rings
Pewter
Odin Figurine
Brigid's Cross
Porringers
Fairy Tales
Pet Jewelry
Seals & Signets
Special Treasures
Silver Dining Ware
Custom Cut Stones
Leather and Belts
Custom Design
Your Design
Gallery
Show Everything
Gold Work
Friends of the Forge
Measuring Ring Sizes
About Brigid's Forge
Links
Order
Email
All items handmade in the U.S.A.
Exhibiting Members of the
Craftsmen's Guild of Mississippi
You are visitor:

|  |

About Us |

Custom designer jewelry
by Robert and Debra Shinn
|

About Brigid's Forge
The Workshop
The Forge
Visit Us
Local Music
Natchez Trace
Nice Places
Family
Sandcast Ankh - continued
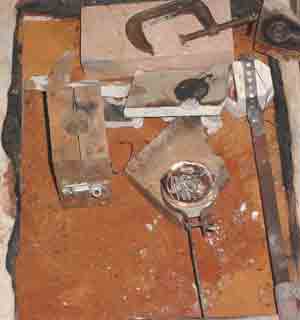
Step 16
Take the flask to the casting box.
Place the upright flask in the casting box,
a wood box filled with sand to contain any spilled metal
and hold used objects that may still be hot.
Firebricks are useful for resting hot objects that do not need to be in the
sand. Two types of crucibles are frequently used for melting the silver: an open dish,
and a covered Burno. For this smaller object, the open dish is preferred.
|
|
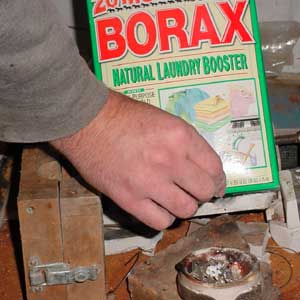
Step 17
Sprinkle borax on the silver.
The silver to be melted is a mix of scrap and casting grain. Sprinkle a pinch
of borax over it in the crucible. Any good laundry grade borax will do.
|
|
Step 18
Boraxed silver.
The sterling silver should appear dusted with the borax.
|

|
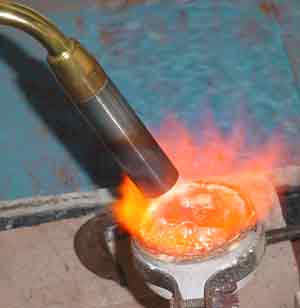
Step 19
Heat the metal.
A Prest-O-Lite propane torch is used to melt the silver.
The flame should be close to the metal; the gas should be at about 25 psi.
After thirty seconds, this approximately one ounce of sterling silver
begins to slump.
|
|
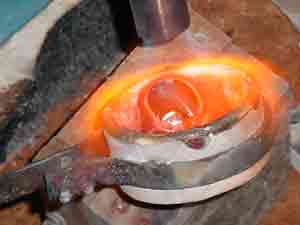
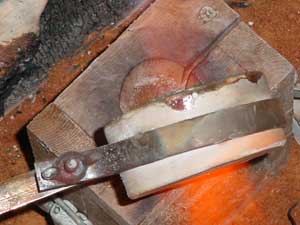
Step 20
Melt the metal.
After about two minutes of intense heat the silver becomes a castable liquid.
It will slosh and roll easily as one unit in the crucible. You must continue heating
beyond the first liquid appearance for an extra thirty seconds to have the
metal hot enough to go all the way down the mold.
|
|
Step 21
Pour the metal.
Still holding the flame on the metal, pour the liquid silver down the pour
hole of the flask. Be quick and steady; a break in the stream of metal
entering the flask will likely spoil the piece, leaving it with gaps.
Next, we see what it looks like!
|
|
<< Previous
Next >>
Back to Workshop
Disclaimer: All techniques described are performered by professionals in a professional workshop.
These techniques work well for us; we do not warrant them for anyone else. We cannot be responsible for
anyone's property, profit, or safety. If you wish to make beautiful objects, pictures and
text are no substitute for a good class.
|